450VS+ Electric Paper Guillotine
User Guide
Below you will find a useful guide to adjusting the cutting depth and the paper squareness of the 450vs+ Electric Paper Guillotine
450VS+ Electric Paper Cutter / Guillotine
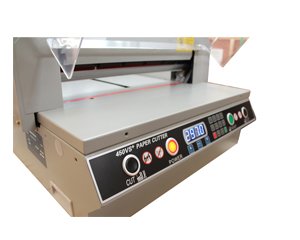
SRA3 Cutting with digital display
450vs+ Electric Paper Guillotine – Adjusting the cutting depth and paper squareness
Place a single sheet (ideally 100gsm bond – SRA3 in size) setting the 450vs+ Electric Paper Guillotine to 297mm depth. Make a single cut and check the results. When the blade is fully sharpened and set correctly, the cut should be made without any noticeable (or minimal) movement of the single sheet. Once the blade has returned up to it’s ‘home’ position, you should be able to move the cut piece away cleanly.. – Should the paper not cut or not cut completely through, you can adjust the depth of the blade by turning the three small grub screws on the blade housing. these can be adjusted as follows;
Lower the blade slightly (as if starting to make a single cut) – this will reveal the screws that hold the blade to the blade housing. – Loosen the fixing screws slightly – This will allow the three small grub screws located on top of the blade housing to be turned clockwise, which will force the blade downwards (very slightly) – Re-tighten the blade fixing screws and test the cut operation once more.. – You may need to repeat the operation (using small turns of the grub screws.. appx. 1 – 2 turns each time) – You may also find that the orange cutting stick has begun to develop a groove? – this will also effect the cutting. in which case, you may need to rotate the cutting stick to a clean surface.. – You can find videos that show how to carry out these adjustments on our website;
https://www.printcutandfinish.co.uk/450vs-video/
Should the above adjustments make little effect on improving the cutting on the 450vs+ Electric Paper Guillotine, it would then be advisable to change the blade for a sharpened one. Again the videos, will show you how to change the blade..
Once you have achieved a good cut you can then proceed to check the squareness of the back stop and side guides. The back stop can be adjusted by loosening the two large allen bolts (visible from above) and adjusting the side pinch grub screws, tilting the back stop in the appropriate direction.. Making pencil marks on each far end of the back stop will help you gauge the distance you are moving / adjusting the back stop bolts.
Adjustment to the side guides can also be achieved by loosening the fixing bolts located / visible from the underside of the machine.
When cutting a paper stack of 100gsm on the 450vs+ Electric Paper Guillotine it is recommended cutting a max. paper stack of 30mm – 40mm – When cutting heavy weigh card or material 12-15mm – With coated stock, card with excess toner coverage or critical cutting required, then lessen the pile height.